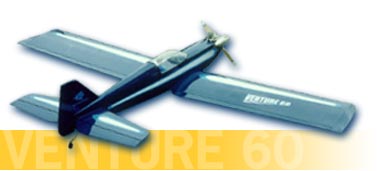
Bruce's Tips for the Venture 60
Many builders have "clipped" their Venture 60 wing by
removing one rib bay on each side. They report a higher roll rate
with little increase in landing speed. I've never tried it myself,
but I've heard enough good reports that I consider it an acceptable
modification if you want to try it.
The Venture 60 is designed for easy covering with the plastic
film of your choice.
When covering with transparents, take extra care to hide your seams
because overlapping creates an obvious color change. Prominent seams
will look okay if you cut the edges perfectly straight with a ruler
and keep the overlap small (about 1/8").
Forget about trying to cover the wing panel and wingtip
with one piece of film. Instead, I like to cover just the wingtip
first using two pieces of film, bottom then top. Now cut the film for
the wing panel and carefully overlap the wingtip covering on the tip rib.
Finish off the canopy edges with 1/4" striping tape.
Use a low setting on your covering iron and give
your striping tape a quick rub to really "set" the adhesive.
The canopy can be tinted if you wish, but watch the water temp! I've sold
lots of replacement canopies to builders who melted theirs. Keep the
water about 100 degrees.
Many builders choose to cut off the cheeks and build
up a soft balsa cowl around the engine for a more streamlined look.
I generally prefer wood props because they are lighter and safer
than composite props.
I like the reinforced-nylon engine mounts
from Hayes. These mounts are light and feature a web that ties the
two beams together for added stiffness.
As with all models, try to keep the hinge gaps as small
as possible for best control response. The Venture 60 kit helps
greatly in this respect because the bevels on all of the control
surfaces are already precisely cut for you!
If you normally fly from grass, you should position the
landing gear 3/4" forward of the location shown on the plans. I've
even heard from builders who fly from tall grass successfully just by
reversing the gear so it sweeps forward.
Standard servos are okay, but I prefer ball-bearing
servos for all of my control surfaces. Without a ball-bearing on the
output shaft, servos that seem "tight" at first will develop excess
play over time. This slopiness in the linkage can possibly lead to
flutter - something you want to avoid with any model!
If anything, Venture 60's tend to come out nose heavy.
You might want to plan ahead for this and make a compartment for your
battery aft of the servos, under your pushrods. The balance range shown on the plans
is very conservative, even the aft limit. I fly mine with the CG about 1/2" aft of the main
spar; other builders go even further aft. You need an aft CG and lots of elevator throw to
do the most spectacular flat spins.
This doesn't just apply to the Venture 60, but I often
see wheel pants attached to models at the wrong angle. They should be
aligned with the line of flight, roughly parallel to the fuselage of
the airplane. I'm also not a big fan of mounting pants with a
friction fit that allows them to rotate if they hit something. I
guess the idea is avoid damage, but they often vibrate loose and rotate on their
own causing far worse damage on landing.
<Back
To Venture 60 Page